
Appearance
Attic Vents
Bottom line
Attic vents must be protected from ember and flame intrusion by Chapter 7A listed vents, though metal screens with 1/8 inch or smaller mesh can mitigate against ember vulnerabilities.
Overview
Attic vents, similar to crawl space vents, are vulnerable to ember intrusion and flame exposure, which can ignite unprotected beams, flooring, or other stored combustible materials. To minimize the chance of ember ignitions, metal mesh screens no larger than 1/8th inch are recommended. Vents incorporating an intumescent coating or tape in the design is used to minimize the potential for flame entry into these enclosed spaces. Once activated, an intumescent product swells and blocks openings when exposed to temperatures above approximately 400 deg F - the exposure can be flame or radiant.
Combustible item storage present
No combustible items should be stored in attics regardless whether Chapter 7A compliant vents are installed. Combustible items stored in attics could be ignited by wind blown embers penetrating through the attic vents. Embers small enough to enter the attic through 1/8 inch mesh attic screens still carry enough heat energy to ignite items stored in an attic.
Debris accumulation present
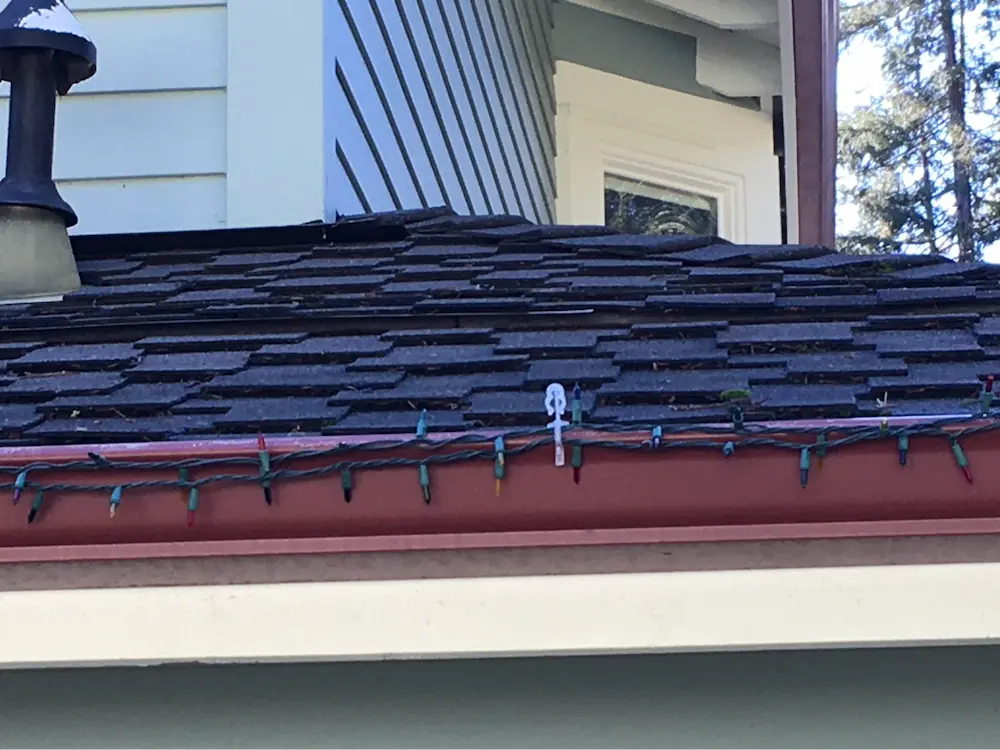
Combustible debris accumulation on the exterior of an attic vent can include plant debris building up around an off-ridge vent or spider webs accumulating around a bird hole vent.
In addition to reducing the effectiveness of the vent and creating the potential for moisture build up in a structure’s attic, the debris is combustible and vulnerable to ignition during a wildfire that could put a heat and flame source in close proximity to the structure’s unprotected attic.
Debris accumulation must be removed.
 Gable vent with debris accumulation. In addition to being combustible, debris reduces airflow to the vented space and can lead to moisture issues over time.
Attic vent type
The variety of attic vents present challenges for retrofitting existing structures, but there are options for all types. We review six of the most common types and provide mitigation options for each.
Bird hole
Bird hole vents are usually groups of two or three 2-3 inch circles drilled through the blocks installed between rafters and backed with mesh screening. They’re called bird hole vents because they resemble the openings of bird houses. Due to construction timeline pressures and the low visibility of these vents under eaves, vent sizes can vary and are often not level with each other.
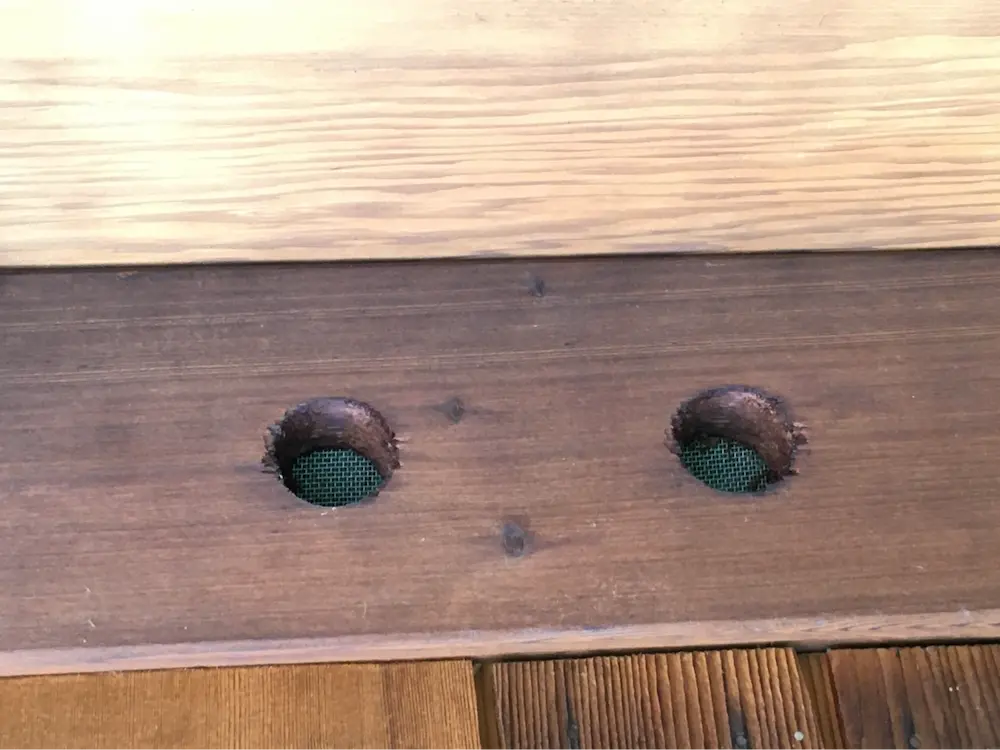 Two bird hole vents with 1/8 inch metal mesh.
Options to retrofit bird hole vents:
- If enclosing eaves, soffited eaves on the outer edge of the roof line will take care of vulnerable attic vents.
- Replace with a Chapter 7A-compliant ember and flame resistant vent.
- Install 1/8 inch (or smaller) metal mesh over the existing bird hole vents. Cut a piece with metal snips large enough to cover all the bird hole vents on a given block and staple securely with a staple gun. Some consider this less aesthetically pleasing, but it is an affordable option. It also doesn’t provide protection from flame intrusion because the new vent will not have an intumescent backing material.
Rectangular
Like Bird Hole Vents, Rectangular vents are cut through the blocks between rafters and backed with mesh screening.
 Soffit vent installed in an enclosed eave.
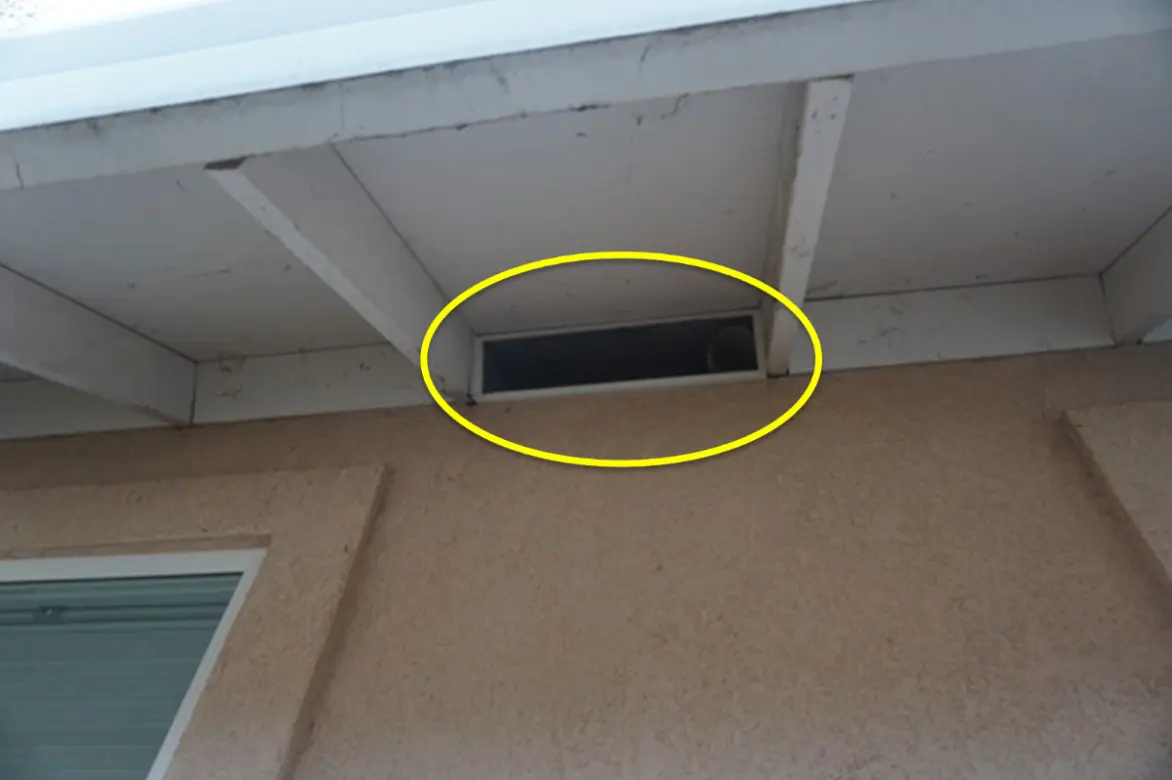 Rectangular attic vent installed in an open eave between rafters
Options to retrofit rectangular attic vents are similar to those for bird hole vents:
- If enclosing eaves, Chapter 7A-compliant soffit vents should be installed on the outer edge of the roof line and will address the vulnerability of the existing attic vents.
- Replace with a Chapter 7A-compliant ember and flame resistant vent.
- Install 1/8 inch (or smaller) metal mesh over or behind the existing vents. Cut a piece with metal snips large enough to cover the vent on a given block and staple securely with a staple gun. Some consider this less aesthetically pleasing, but it is the most affordable option. This treatment option doesn’t provide protection from flame intrusion because the new vent will not have an intumescent backing material.
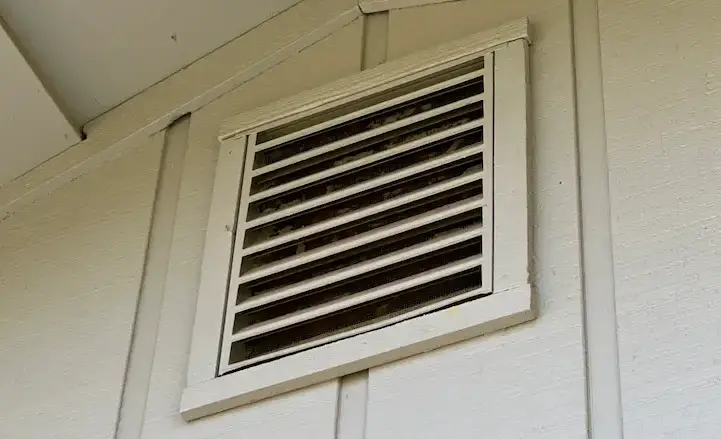
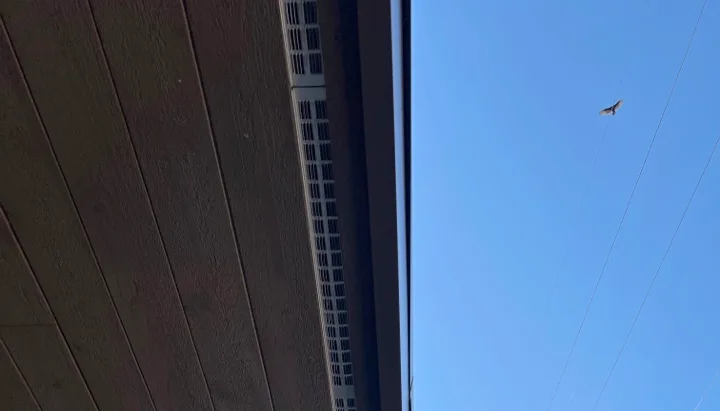
Gable
Gable vents are installed at the gabled ends of attic spaces and are typically rectangular in shape. They provide cross ventilation of attic spaces and are a large potential entry point for embers.
It can be difficult to detect the backing screen size from the building exterior due to the presence of exterior louvers, but one can usually get a better view by observing from immediately below the gable looking up or using a camera attached to a monopole to photograph it up close. Where attic access is possible, it’s best to assess from the interior.
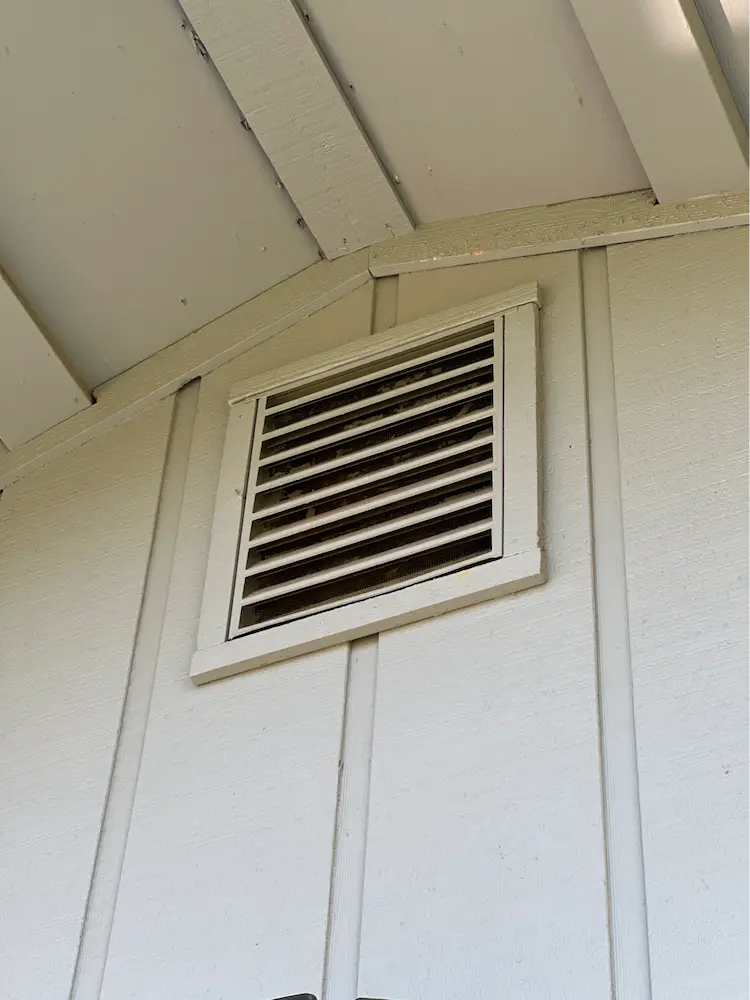 Gable vent with exterior downward angled baffles. These can be difficult to assess from the ground but magnification with a camera or bright flashlight illuminating it at a certain angle may assist with identification.
Here are some options to harden gable vents against wildfire threats:
- Replace with a Chapter 7A-compliant ember and flame resistant vent.
- Install 1/8 inch (or smaller) metal mesh behind the existing vent. Cut a piece with metal snips large enough to cover the vent and staple securely with a staple gun. This treatment option doesn’t provide protection from flame intrusion because the new vent will not have an intumescent backing material.
Off-ridge
Off-ridge vents provide in-slope attic ventilation through the roof deck. They are typically integrated into the roof by installing the roofing system on top of them to create a low profile look. Off-ridge vents come in a variety of styles, dimensions, and profiles and can be made of plastic or metal, which can be difficult to assess from the ground. If assessing many structures, you may learn to recognize the most common products; for example, common plastic product is Shingle Vent II.
Low profile
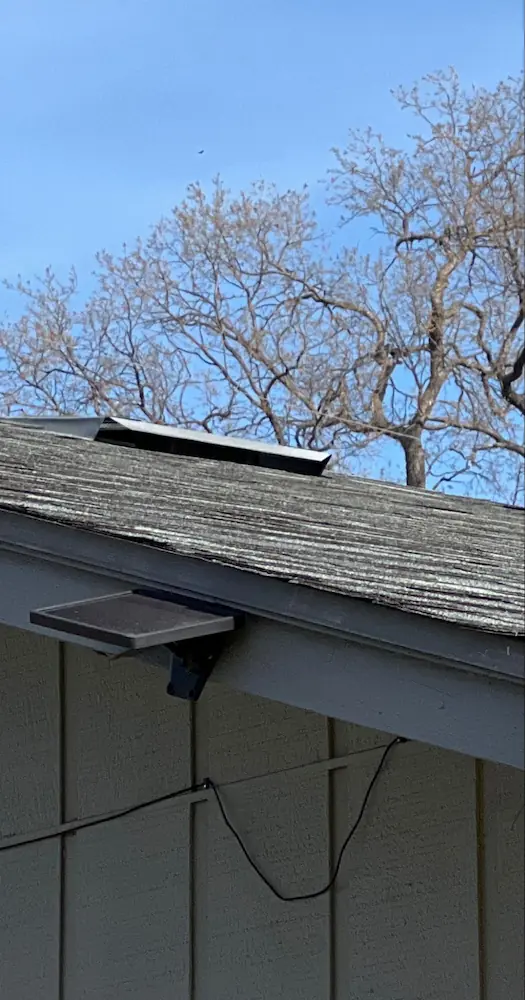 Common low profile off-ridge attic vent installed on an asphalt composite shingle roof. This vent does not feature external baffles that would accumulate debris and embers during a wildfire; however, the screen mesh size is difficult to assess from the ground and is typically greater than 1/8 inch.
 This low profile off-ridge vent is subtle and runs the full width of the photo just below the stovepipe. This vent was manufactured by <a href="https://ohagin.com/">O’Hagin</a> and is not a Chapter 7A compliant vent.
Turbine vents
Turbine vents, also known by Lomanco’s brand name, Whirlybirds, provide unpowered active ventilation to unconditioned attic spaces. At this time, there are no active ventilation options available that resist ember and flame intrusion, and it is not possible to assess their resistance to ember intrusion without examining them up close from the attic or interior location.
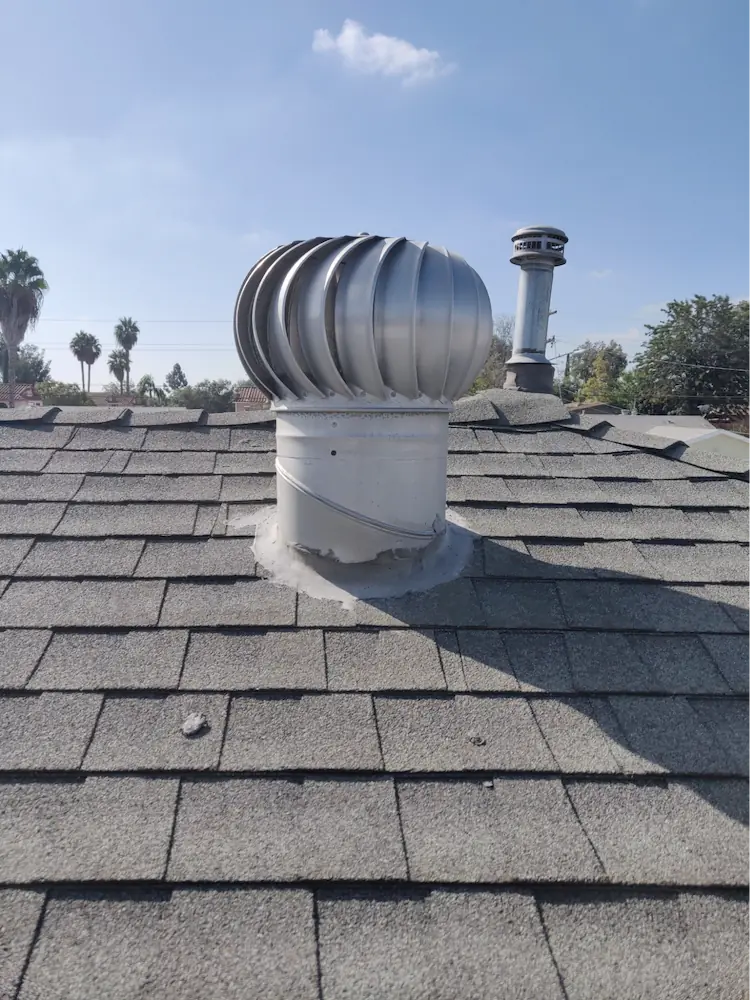 Whirlybird brand turbine vent installed on an asphalt composite shingle roof. Mesh screening for these vents, when present, can only be assessed from the interior and the mesh screen size is typically greater than 1/8 inch mesh.
Powered fan vents
Solar or electric powered fan vents on a thermostat are used to provide active ventilation of attic spaces. As with other off-ridge vents, it’s difficult to assess the interior screen mesh size and vent material from the ground.
Circular vents have less debris accumulation potential and, therefore, more resistance to direct flame ignition from debris, but rectangular plastic vents are a concern.
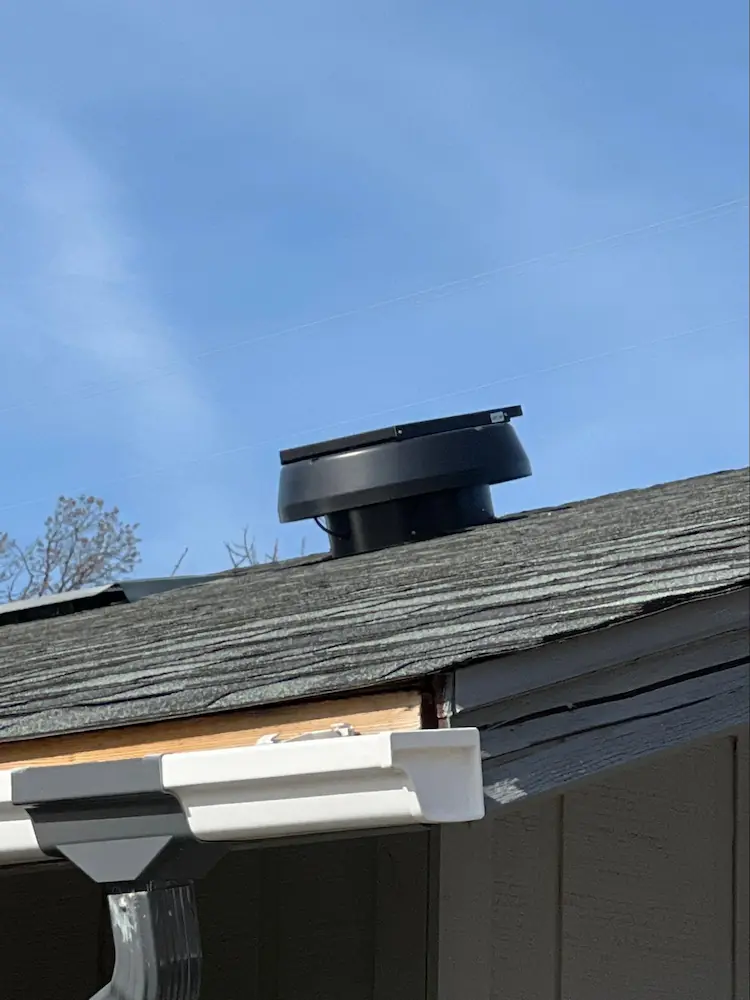 An off-ridge solar-powered fan vent that provides active ventilation of the attic space.
Off-ridge vents that incorporate an intumescent backing material became available around 2015 but are difficult to detect without accessing the attic space or roof and assessing up close.
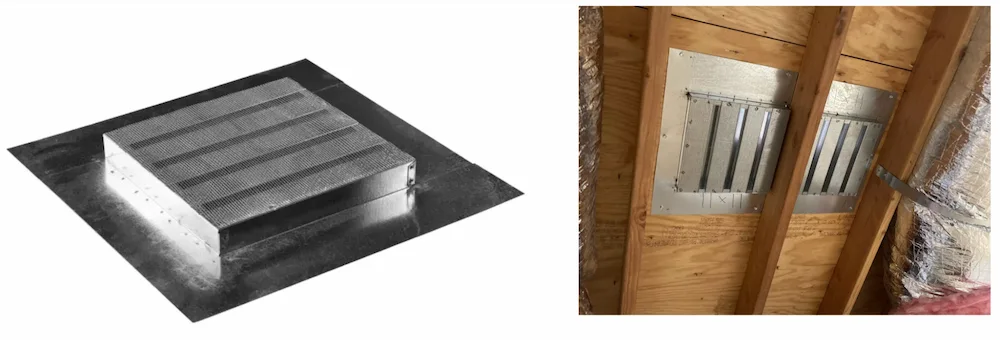 Figure - Brandguard Chapter 7A compliant vent that is installed from the attic. Could be suitable for retrofitting an existing off ridge or turbine vent. Source: <a href="https://www.brandguardvents.com/">BrandGuard</a> website.
There are generally two mitigation options for off-ridge vents:
- Install 1/8 inch (or smaller) metal mesh screens from the interior. Care must be taken to ensure no gaps larger than 1/8 inch are present, which would allow embers to get through and potentially ignite combustible items stored in the space.
- Replace the existing off-ridge vent with one rated for ember and flame resistance and on the CA OSFM list of approved products here. This is not technically difficult to do but may not integrate aesthetically with the existing weathered shingles if new shingles are used.
Ridge
Like off ridge vents, ridge top vents are integrated into the roof and provide exhaust ventilation for unconditioned attic spaces. They share similar design features as well.
Ridge vents can be made of plastic or metal, which can be difficult to assess from the ground. The best method is to learn to recognize the most common products; for example, common plastic product is Shingle Vent II.
Some models include an external baffle to protect against wind driven rain and ember intrusion. However, if the baffle is made of plastic, it increases the risk of debris accumulation being ignited by embers. Note this in the External baffle present section.
Ridge vents that incorporate an intumescent backing material are difficult to detect without accessing the attic space and inspecting up close. However, they are not yet common.
If the roof is planned to be replaced, then any replacement ridge vents should be ember and flame resistant, constructed of metal, and if present, a metal exterior baffle. CA OSFM maintains a list of approved makes and models here.
Assuming the roof is not being replaced, there are several mitigation options:
- If an external baffle is plastic, install metal angle flashing with the trough positioned over the lip of the plastic baffle so that it covers both above and below the baffle and protects it from debris accumulation and ember ignition.
- Replace the existing ridge vent with an ember and flame resistant model constructed of metal with a metal exterior baffle.
Soffit
Soffit vents are installed on horizontal surfaces like the underside of an enclosed eave or exterior ceiling. According to testing done by the Insurance Institute for Business and Home Safety, soffit vents are less susceptible to ember exposures during a wildfire because embers that encounter a vertical wall and travel upwards mostly fall to the ground when the hit the underside of an enclosed eave (or continue traveling upwards if they encounter an open eave).
New soffit vents should be installed towards the outer edge of the roofline to minimize their ember exposure.
All soffit vents should comply with Chapter 7A requirements and will be assessed for compliance and screen mesh size.
To mitigate a soffit vent, there are two familiar options:
- Replace with a Chapter 7A-compliant ember and flame resistant vent.
- Install 1/8 inch (or smaller) metal mesh over or behind the existing vents. Cut a piece with metal snips large enough to cover the vent on a given block and staple securely with a staple gun. Some consider this less aesthetically pleasing, but it is the most affordable option. This treatment option doesn’t provide protection from flame intrusion because the new vent will not have an intumescent backing material.
 Soffit vent on the underside of an enclosed eave.
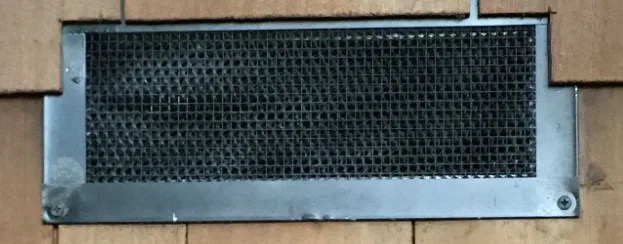
Screen mesh size
Traditionally, attic vents were designed to ventilate a space while preventing critters from taking up residence in it. Most are 1/4 inch, which work well for this purpose, but embers larger than 1/8 inch that are able to pass through a vent contain enough energy to ignite combustible materials, including rafters and some joists.
To mitigate an attic vent with a mesh screen size greater 1/8 inch:
- Replace with a Chapter 7A-compliant ember and flame resistant vent.
- Install 1/8 inch (or smaller) metal mesh over or behind the existing vents. Cut a piece with metal snips large enough to cover the vent on a given block and staple securely with a staple gun. Some consider this less aesthetically pleasing, but it is the most affordable option. This treatment option doesn’t provide protection from flame intrusion because the new vent will not have an intumescent backing material, but it will reduce the most common risk of destruction: ember ignition.
While 1/16 inch screens provide the greatest protection against embers that can ignite a fire, they are more prone to clogging due to dust and debris and may require more maintenance to ensure airflow.
Another thing to keep in mind is that retrofitting with small mesh screen sizes can reduce airflow and require either new vents to be installed to maintain enough ventilation for the attic space or enlargement of existing vents during replacement. This is a standard calculation that should be performed by a contractor (see CBC Title 24, Chapter 12, Section 1202), but the figures below can provide general guidance:
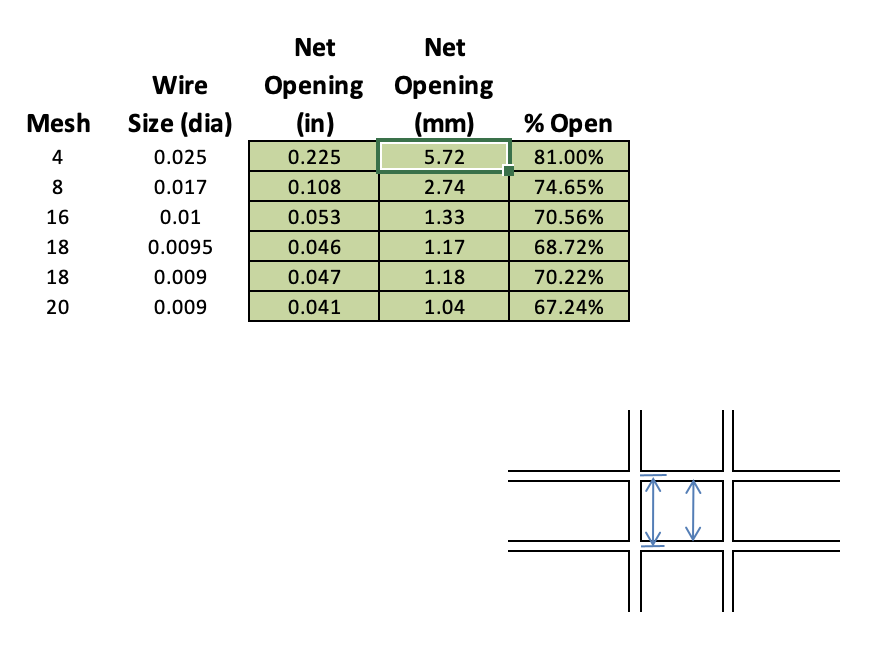 Table showing the dimensions of different mesh screen sizes and the relative percent open they are (vs. no screen), which can impact the amount of ventilation available for a given space. Going from 1/4 inch mesh to 1/8 inch mesh reduces the amount of open space in the vent from 81% to ~75%.
Chapter 7A compliant
The California Building Code Title 24, Chapter 7A specifies the building codes for structures built in the State Responsibility Area (SRA) and Local Responsibility Areas (LRAs) where adopted by local jurisdictions. All structures permitted to begin construction in the SRA since July 2008 have had to comply with Chapter 7A.
Chapter 7A now requires that all vents be rated to resist ember and flame intrusion in a test facility in order to be listed as approved by the California Office of the State Fire Marshal (OSFM).
The most common method to achieve ember resistance is a mesh screen size of 1/8 or 1/16 inch. To resist flame penetration, manufacturers typically use an intumescent coating, which is a temperature sensitive material that swells shut when exposed to heat and are effective at mitigating flame intrusion into structures. Currently, only vents with an intumescent-coated backing material comply with Chapter 7A wildland urban interface (WUI) building codes.
 A newly installed rectangular Chapter 7A compliant Vulcan Vent with intumescent backing material that swells shut when exposed to flame
To assess flame resistant vents, look closely from the exterior at the area just behind the mesh screen to identify a backing material, which will typically have a honeycombed structure. As of September 2022, The only products on the market that are rated for flame resistance are those featured on this list maintained by the CA OSFM, including Vulcan Vents, Embers Out, Brandguard, and O’Hagin.
If you assess structures often, you should familiarize yourself with the approved products and learn to recognize them.
While structures located outside the SRA aren’t required to have Chapter 7A compliant vents, Madronus strongly recommends that all vents on a structure be retrofitted with Chapter 7A compliant vents, if feasible.
Note that when retrofitting, Chapter 7A compliant vents typically offer reduced airflow compared with the vents they’re replaing. This will require either new vents to be installed to maintain enough ventilation for the space or enlargement of existing vents during replacement. This is a standard calculation that should be performed by a contractor (see CBC Title 24, Chapter 12, Section 1202), but the figures below can provide general guidance:
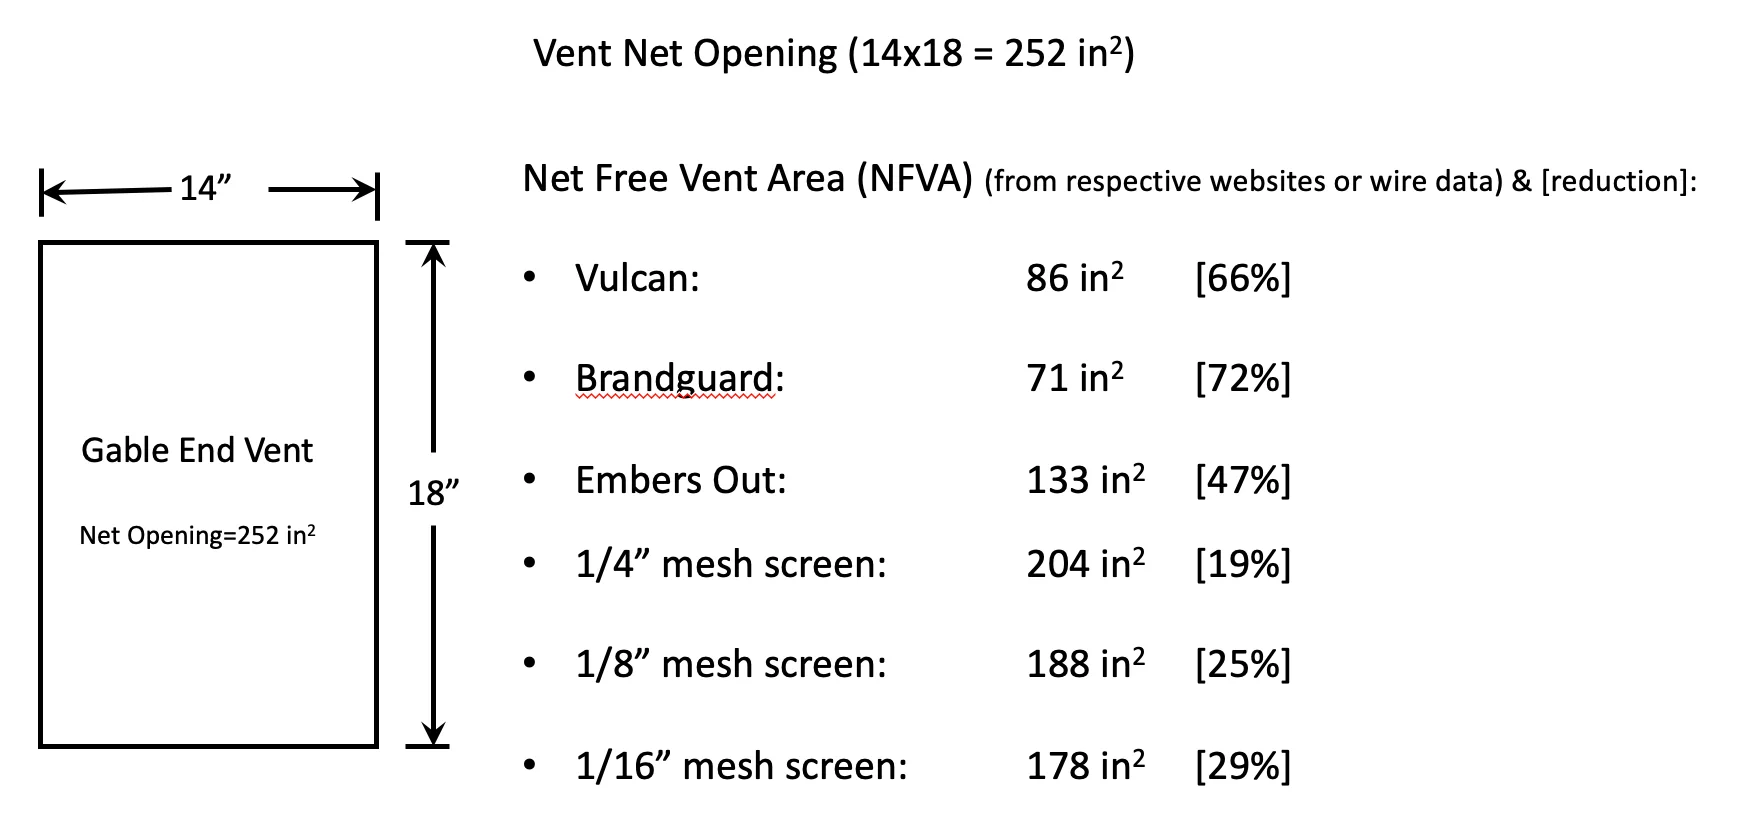 An example incorporating mesh and flame and ember resistant vents in a gable end location. Net free vent area (NFVA) for commercial products from the manufacturer’s own data on their websites. Note the meaningful reduction in NVFA that would occur if a 1/8 inch mesh screen were replaced with one of the three Chapter 7A compliant products.
External baffle material
Baffles, whether plastic or metal, have been shown to be effective at minimizing ember entry. However, external baffles are inherently prone to debris accumulation, which occurs to many structures involved in a wildfire. This means plastic components in attic vents are vulnerable to flames once embers ignite any debris that accumulates at the entry to vents.
Treatment options are discussed in the Off ridge and Ridge sections. If an external baffle is plastic, install metal angle flashing so that it covers both above and below the plastic baffle and protects it from debris accumulation and ember ignition. Or, the plastic vent can be replaced with a metal option.